/ Chocolate Resources / Chocolate Blog / Tips for better chocolate photography for social media
Tips for better chocolate photography for social media

It’s a fact – social media and chocolate were made for each other. It is the perfect way to share luscious images that will have customers lining up to try your amazing bars, bonbons and other assorted chocolatey goodness. But unfortunately, as business owners and entrepreneurs, we are not all photographers. It’s not something that comes naturally to many of us. And we can’t always afford to hire a photographer for every social media post. So what can you do? Here are some simple chocolate photography tricks for taking and editing photos for your social media platforms. You don’t need a fancy camera – your smartphone can absolutely do the job. To be clear – we are not talking about chocolate photography for your website. That is absolutely best left to the pros and well worth the investment because your website is such a critical business tool.
Think of your social media profiles as a storefront – if someone wandered by on the street, what is the impression of your business that you want to convey? Blurry photos? Unappetizing product? Definitely not – remember, if all you have to post is a bad photo, it is better not to post anything at all.
We are so fortunate that our EC grad, chocolatier extraordinaire AND photographer Jessica Washburn collaborated with us on this post – thank you so much Jessica! Speaking of stunning Instagram pages, go check hers out and give her a follow @pastrypastmidnight. She also has an Instagram account for her new chocolate business Bliss Chocolatier! Here are some tips for taking great photos, and some editing tricks to help you create a beautiful social media feed.
Taking photos
1) Make sure your product is ready for its close up, and looking as luscious as possible
First of all, you need to make sure your product looks its very best. This means no finger marks, no smudges, perfect edges etc. We’ve seen many photographs where a product that is no doubt delicious hasn’t been presented in its most flattering form. Given that chocolate is brown in color, it can go from appetizing to awful very quickly (if you know what we mean)!
2) Setting up your photo shoot space: Natural light is your friend, the flash is not
Next, you need to consider the set up for where you are taking your photos. We see photos on Instagram ALL THE TIME where it’s clear that the photo has been taken in a room with an overhead light on. Or even worse, in a dark room with an overhead light on. The light creates shadows, it can reflect off the surface of the chocolate in weird ways, and it makes it really difficult to create a beautiful photo. Unless of course you happen to have a photo studio in your shop or office and know how to use lights properly.
Below are two photography set ups that Jessica uses most often in her images, with or without a reflector depending on the quality of the light. You can use these same angles and set-ups in front of a large window as well. Notice how the sun is not shining directly into the house. You can see where the bright sun meets the shade just outside her back door. I’ve also even set up a little makeshift studio in my front hall before. Whether you are using a digital camera or your smartphone, you might consider buying a tripod. This helps to keep the camera steady and reduces blurriness.

Photo: Jessica Washburn @pastrypastmidnight

Photo: Jessica Washburn @pastrypastmidnight

Front hall makeshift photo studio

Photo: Jessica Washburn @pastrypastmidnight
Directional Light versus Flat Light
Another factor to consider is directional vs. flat light. Compare the two photos below. The first is a photo that Jessica took on a very dark day. She had commitments that kept her from shooting at the best time of day. She took her bonbons outside into a shady spot on her patio, to the edge where the sun met the shade. There was a lot of nice soft light but it was very flat.
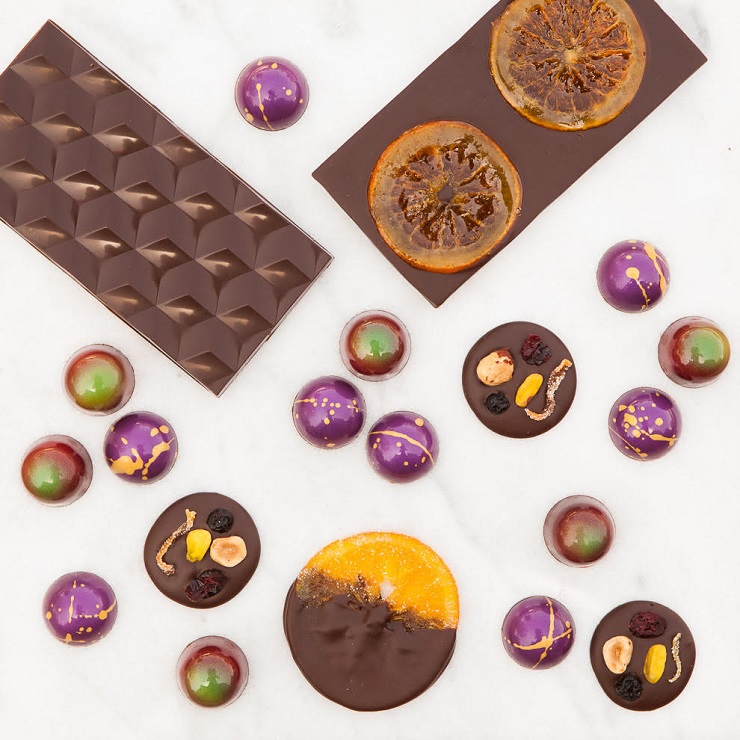
Photo: Jessica Washburn @pastrypastmidnight
Just as she was done shooting, it became bright enough to pull her subject inside and place it right in front of an open doorway. This created beautiful directional light coming from the upper right corner that added depth and beautiful highlights to her image.

Photo: Jessica Washburn @pastrypastmidnight
3) Shooting your chocolate: You will have to take more than one photo (and this also gives you choices)
This may seem obvious, but you’d be surprised how many blurry product photos we see on Instagram. It doesn’t have to be magazine quality perfection every single time, but it should be in focus at a minimum. Try the shot from a few different angles – overhead, from the side, using different props, close up and from further away. This will give you several options to choose from. And in the best case scenario, you will end up with multiple photos that you can use at other times. Having a library of product photos is always a good thing. And since you’ve bothered to set up your makeshift studio, you may as well take several photos at once.
Setting up your photo composition
How you set up or compose your photo is directly related to how visually appealing it is to your audience. Jessica has shared some different options for composition. Compare the next two images that demonstrate the concept of "filling the frame". The first image is nice, but it doesn't have the impact of the second image. Bonbons are small, don't be afraid to get close or crop out unnecessary background space.
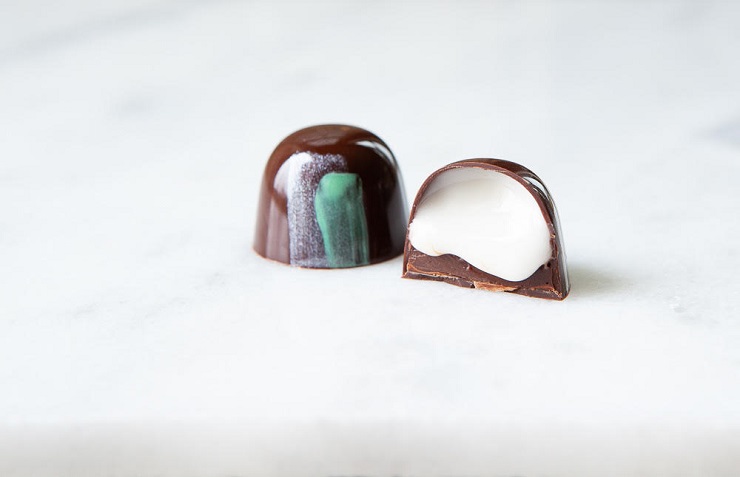
Photo: Jessica Washburn @pastrypastmidnight

Photo: Jessica Washburn @pastrypastmidnight
Extreme close-ups are always very dramatic. A macro lens for your DSLR or a macro lens attachment for your phone camera can help you capture every delicious detail. You can easily order an attachment for your phone camera online for around $40.00.
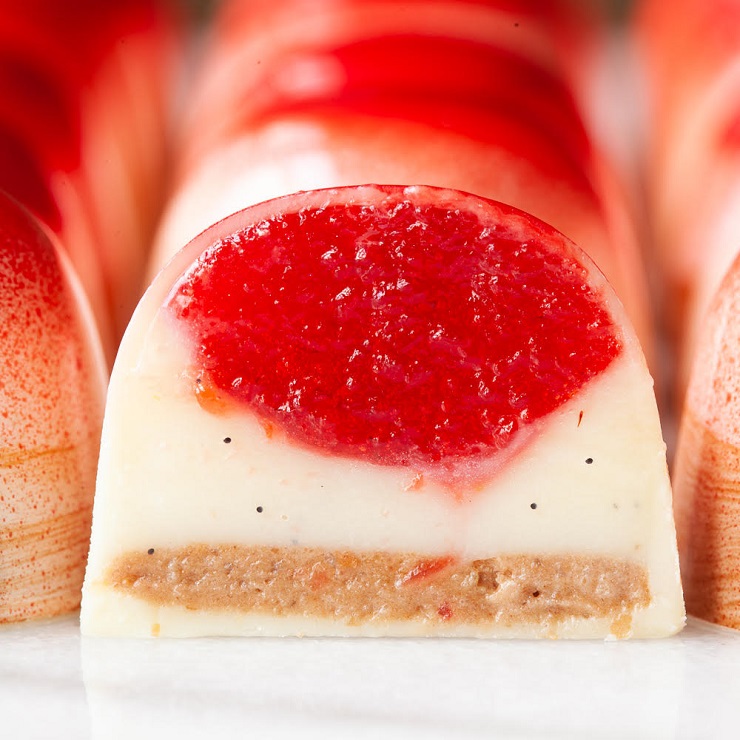
Photo: Jessica Washburn @pastrypastmidnight
Rule of Thirds: One of the best known rules of composition is called the "Rule of Thirds." Mentally divide your image into thirds horizontally and vertically. Put your focal point on one of the four intersection points to add interest to your image.

Photo: Jessica Washburn @pastrypastmidnight
You don't always have to use one of those intersection points, but it's generally a good idea to place your focal point along one of the lines.

Photo: Jessica Washburn @pastrypastmidnight
Triangles and Diagonals: Using triangles, groups of three, and diagonals are all good ways to add interest and dynamics to otherwise static and motionless subjects like pieces of chocolate. Try arranging your pieces in groups of three and forming triangles to create more harmonious images.

Photo: Jessica Washburn @pastrypastmidnight
Or add depth and create visual interest by using diagonal lines in your compositions, as in the two photographs below.

Photo: Jessica Wasburn @pastrypastmidnight
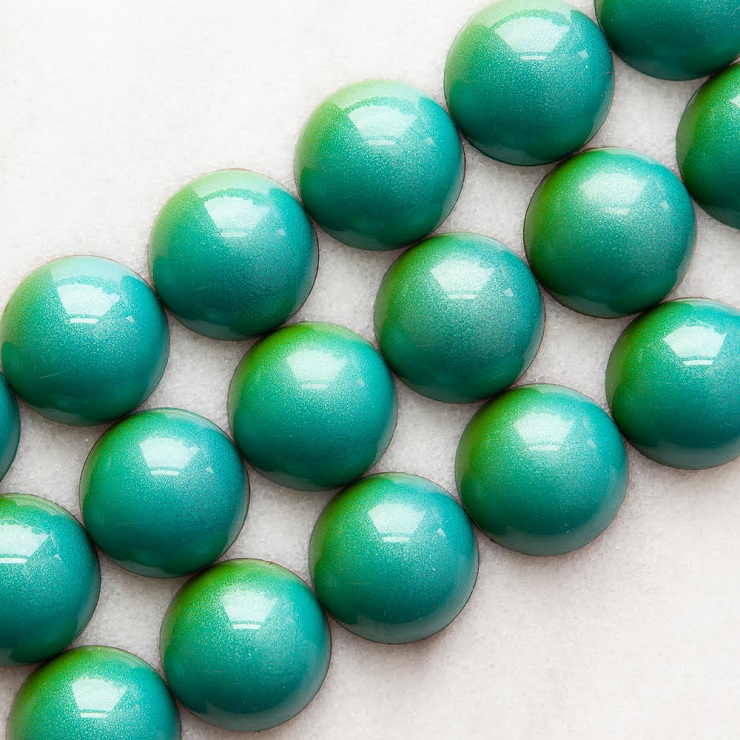
Photo: Jessica Washburn @pastrypastmidnight
Consider using zoom:
You may also wish to consider using zoom in your chocolate photography. In the first image, the phone is placed very near the subject. The bonbon in the foreground looks much larger than the others, and the bonbons in the background look quite far away. The background also appears to almost curve away from the subject in the foreground (lens distortion).

Photo: Jessica Washburn @pastrypastmidnight
Compare this to the second image where the zoom feature was used. The bonbons appear more similar in size. The background is also narrower and the bonbons in the background look closer to the bonbon in the foreground (a phenomenon called background compression).

Photo: Jessica Washburn @pastrypastmidnight
4) If your packaging is clear, take your product out before you photograph it.
Unless you are trying to capture your packaging, take your product out before you photograph it. Clear packaging of any kind is notoriously hard to photograph because the packaging itself creates a reflection and makes it really hard to see the product inside. If you must photograph your product inside a clear, plastic package, then be sure to play with different angles to try to minimize that reflection. You may have to prop your packaging up from underneath to achieve this.
Editing photos
There are several photo editing apps that you can download to your mobile phone that will help edit your photos. But remember, not even the best editing can save a bad photo. So tips 1 – 4 are the place to start. Some of the apps that we have used include Pic Tap Go, Snapseed and Literoom. Depending on what you want to do to the photo, you may need more or less sophisticated tools. Pic Tap Go has filters that can be applied to photographs. Many bloggers find one that they like, and tend to use the same one for almost all of their photos because they are going for a harmonious look for their Instagram feed. Snapseed is great for touching up specific spots in a photo that may be a little too dark or too light. It may take some experimenting to find the app that is simplest to use and achieves the look you are going for. The good news is that most of them are very user friendly.
Editing photos in the Instagram app
Good chocolate photography is important for ALL social media channels of course, not just Instagram. But since images are the focus of Instagram, we thought we would share some tips for editing for Instagram specifically. You can also edit your photos in the Instagram app itself. In a social media photography course I took, the photographer gave us a basic photo editing formula that works for many photos. Simply open the photo you wish to post, and click on "edit". Then, you edit your photos in this order, assigning these values to each:
- Brightness: between 30-40
- Highlights: between 30-40
- Shadows: between 30-40
- Contrast: around 50
Of course there will be some variability depending on your specific photo, but we’ve found that generally, these values tend to work well. Below is an example of an unedited photo, followed by the edited version. Simply brightening the photo and reducing some of the shadow makes the photo come alive.


We hope these tips help you to up your chocolate photography game and create a beautiful Instagram page that you can be proud of! Huge thanks again to our EC grad Jessica Washburn for her help with this post. You can find her beautiful Instagram page @pastrypastmidnight. And be sure to check out the page for her chocolate business @blisschocolatier
Want to learn more about making delicious chocolates and confections? Check out our Professional Chocolatier Program!
Get reminders about upcoming classes! To receive program updates and news, click the link below.
Photography by Jessica Washburn, Bliss Chocolatier and Ecole Chocolat
Quick Site Nav


Contact Us
Email: info@ecolechocolat.com
Visits by appointment only:
505 Montgomery
San Francisco, CA U.S.
1-213-291-8309
Canadian or International
1666 West 2nd Ave
Vancouver, B.C. Canada
1-604-484-1872
Ecole Chocolat is a woman-owned and operated chocolate education organization. Founded by chocolatier, Pam Williams, we are the professional school of chocolate arts for both chocolatiers and chocolate makers. We also donate our time, leadership, expertise and funds to preserve the fine chocolate industry and save fine cacao.